
 Nodaro Docs
Build your first workflow
Build a workflow step by step in Nodaro, from a text prompt to an image, a video and a voiceover, and learn how to connect nodes, run them and change models.
A workflow is a set of nodes on the canvas, connected so that each node passes its result to the next one. In this guide you build one from an empty canvas: a text prompt becomes an image, the image becomes a video, and a voiceover joins the video in one finished file. Along the way you learn how to add and connect nodes, run one node or the whole workflow, find results and change models.
What you build
You use five kinds of node. Each one is in the node picker, which opens when you press Tab on the canvas.
| Node | Where to find it in the node picker | What it does here |
|---|---|---|
| Text | Automate › Text › Text, also under Common | Holds your prompt or your narration. Free. |
| Generate Image | Image › Create › Generate Image | Turns the scene prompt into an image. |
| Generate Video | Video › Create › Generate Video | Animates the image into a video clip. |
| Text to Speech | Audio › Speech & Voiceover › Text to Speech | Reads the narration aloud. |
| Merge Video & Audio | Video › Sound for Video › Merge Video & Audio | Puts the voiceover on the video. |
Part 1: from a prompt to a video
Create an empty workflow
On the home screen, click New Workflow. Nodaro creates an empty workflow in your default project, My Recent Flows, and opens it in the editor. The editor saves your work automatically.
Add a Text node with the scene
Point at an empty spot on the canvas and press Tab. The node picker opens. Type text in the search box and choose Text. Click inside the new node and describe the scene:
A white lighthouse on a rocky cliff at sunset, waves breaking below, seagulls in the golden light, cinematic wide shot
Add Generate Image and connect it
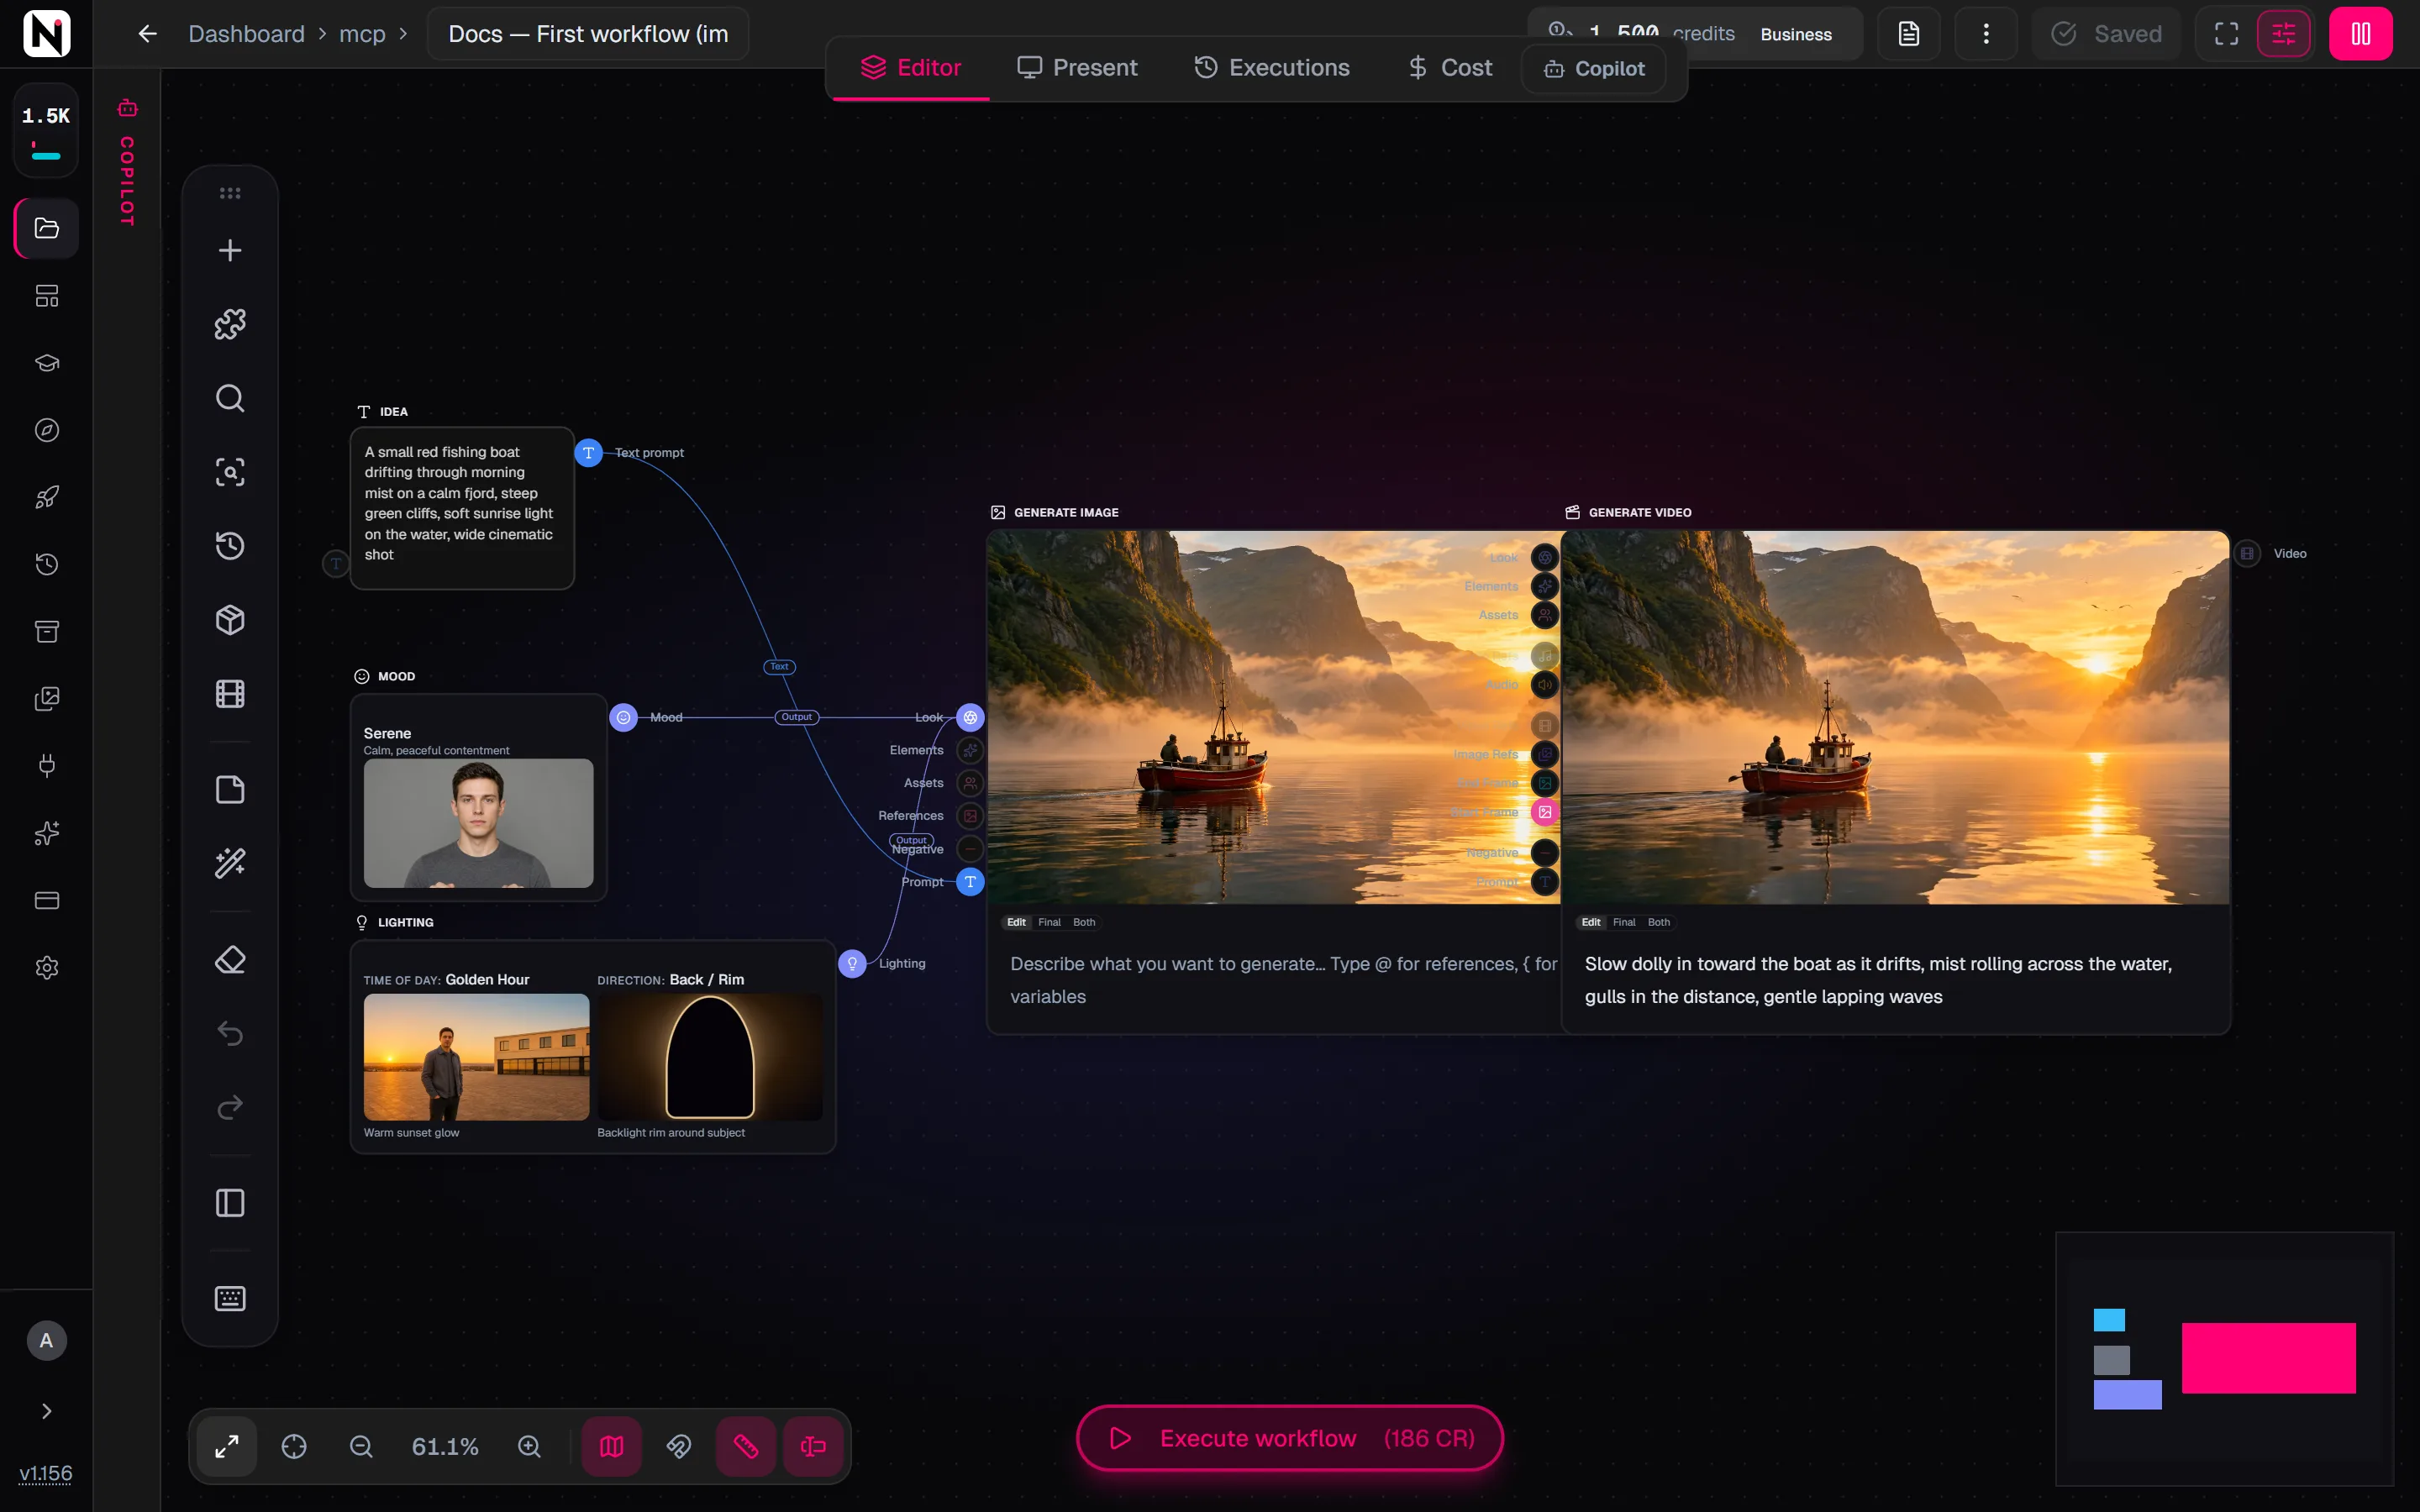
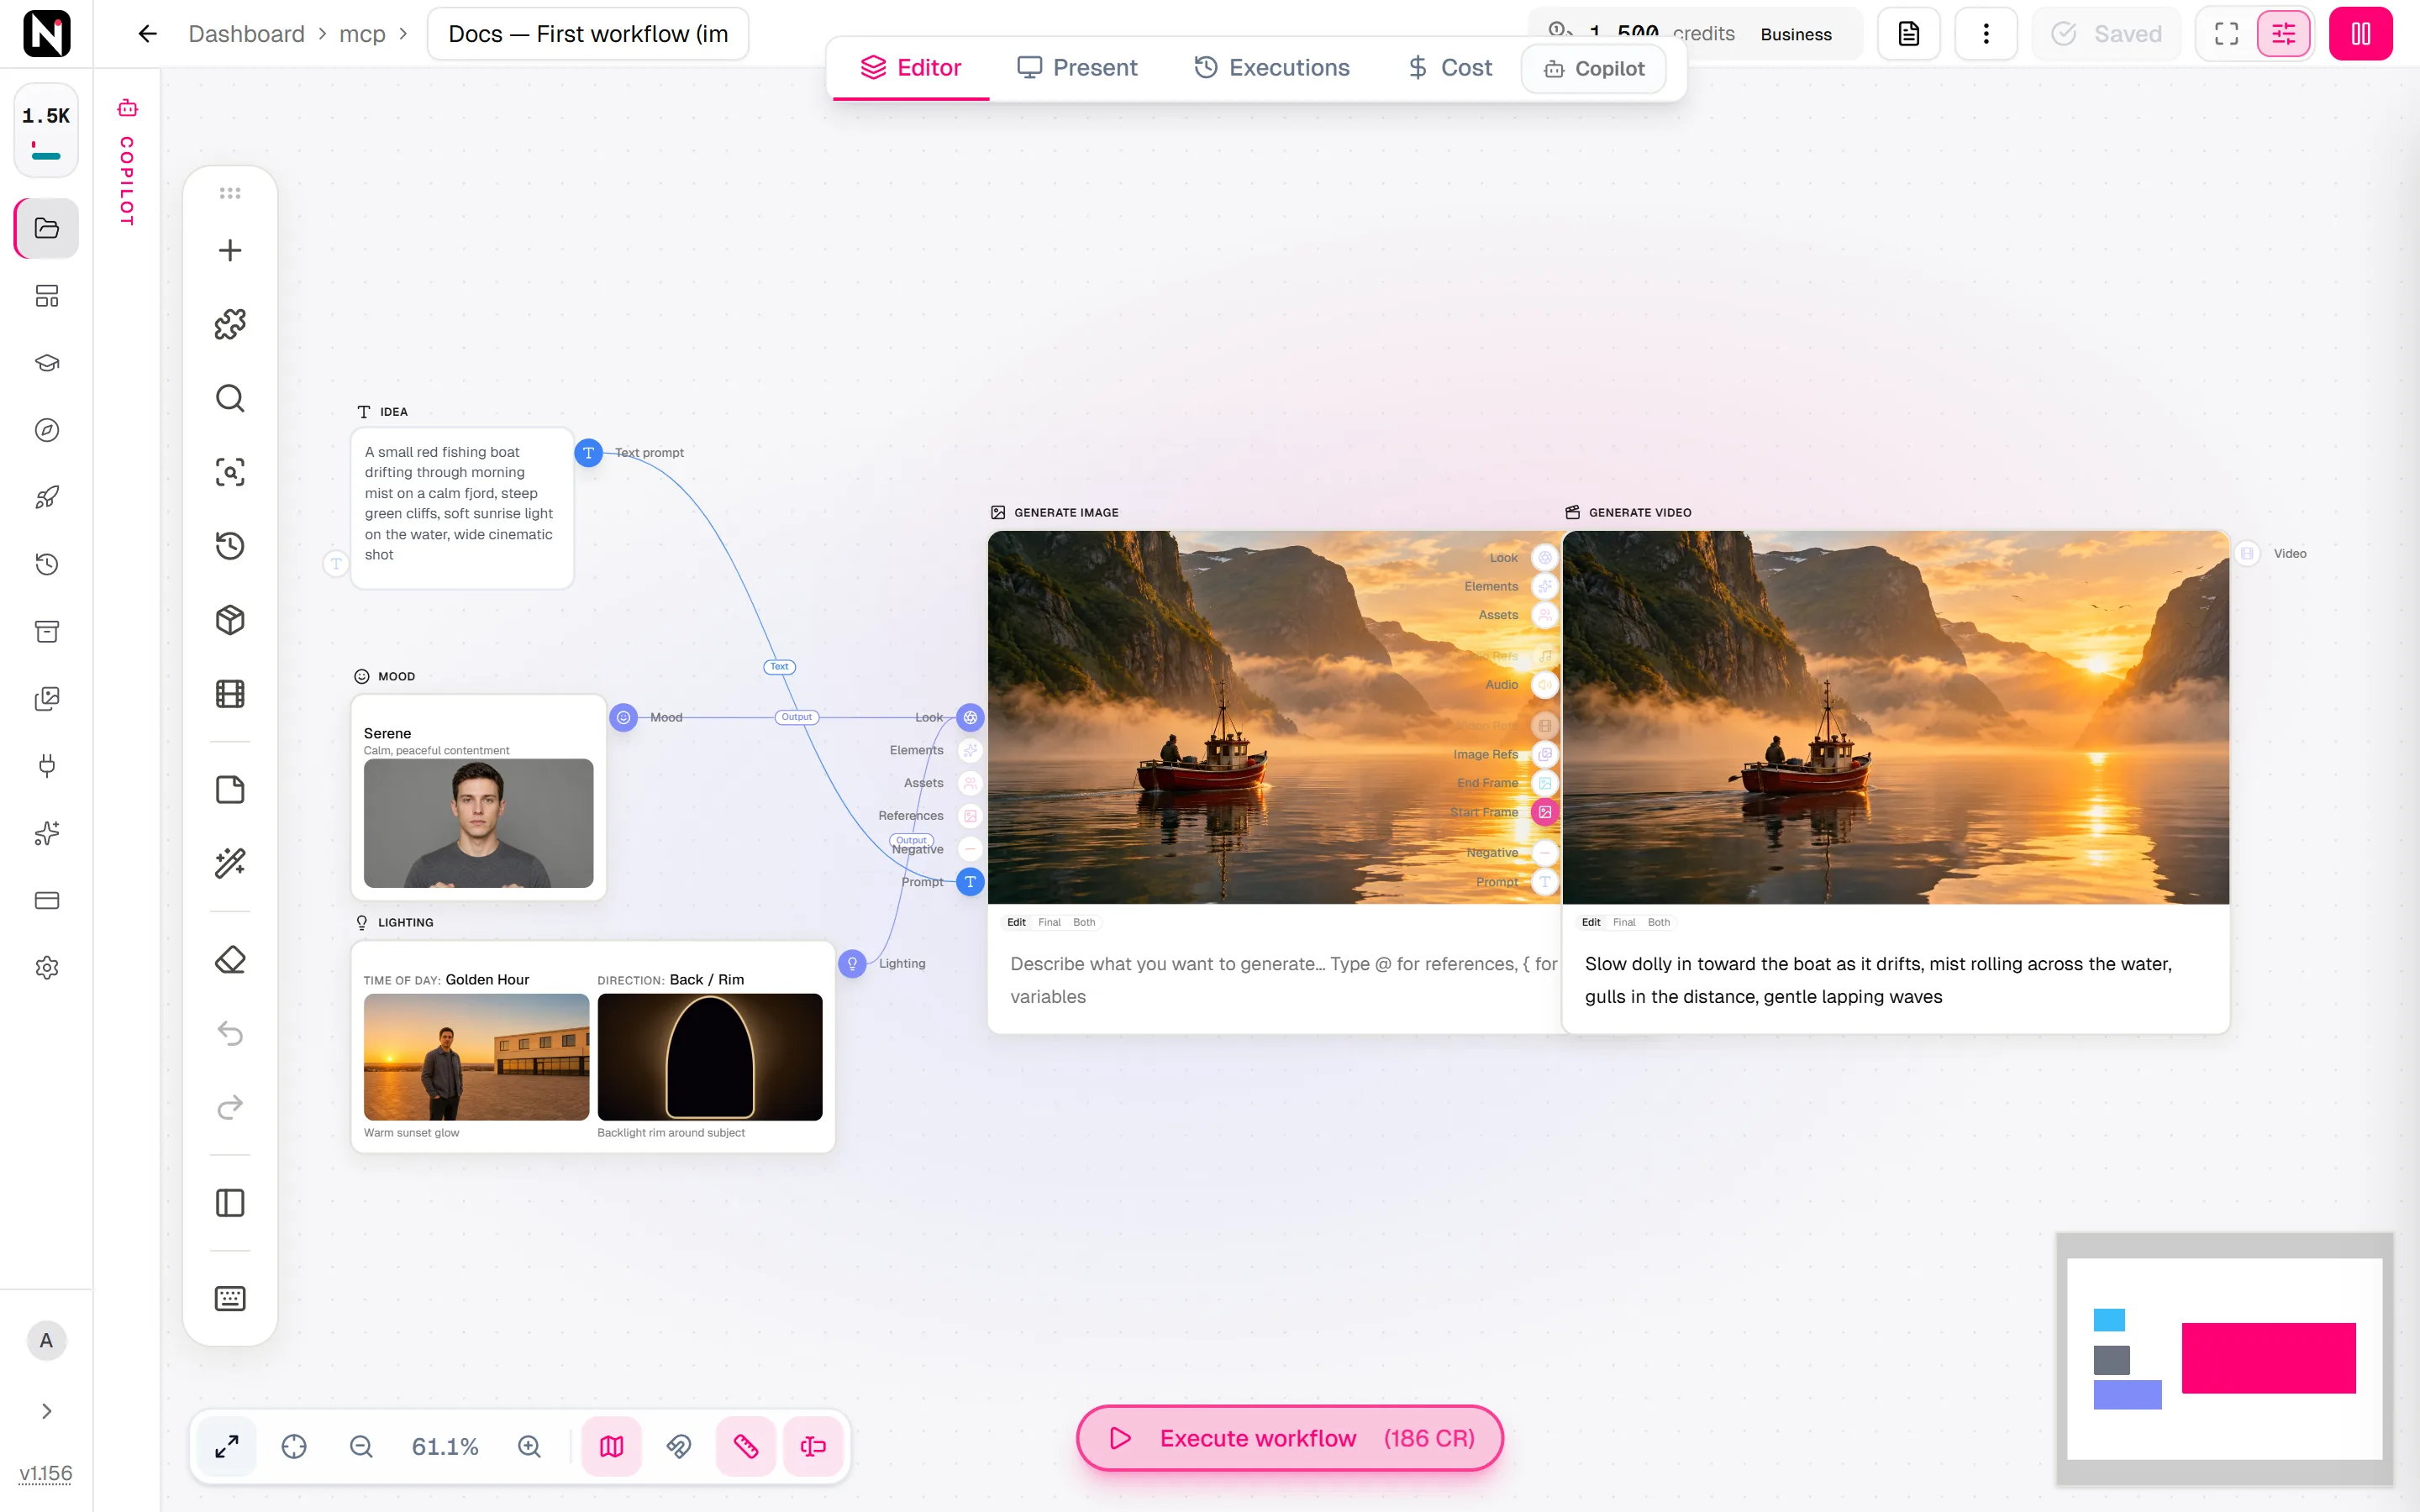
Press Tab again and choose Generate Image. Then drag from the output on the right edge of the Text node to the Prompt input on the left edge of Generate Image. A line appears between the two nodes: that line is a connection.
Run the image
Point at the Generate Image node. A strip appears under it with the model, the aspect ratio and a Run button that shows the price. Click Run. The node shows its progress, and the image appears on the node when it is ready. The default model is Nano Banana Pro.
Add Generate Video and connect the image
Add a Generate Video node. Drag from the output of Generate Image to the Start Frame input of Generate Video. The image becomes the first frame of the video.
Describe the motion and run the video
Type what moves in the prompt area at the bottom of the Generate Video node. You can also double-click the node and use Prompt in its settings panel, or press Ctrl+E to open a larger prompt editor.
Slow push-in toward the lighthouse, waves roll in, the beam of light begins to turn
Click Run under the node. A video takes longer than an image, and the progress bar on the node shows how far it is. The default model is Seedance 2 Fast.
Part 2: add a voiceover
Add a second Text node for the narration
Add another Text node and write the words the narrator says:
Every night for a hundred years, this light has guided sailors home.
Add Text to Speech and choose a voice
Add a Text to Speech node and connect the narration to its Prompt input. Double-click the node to open its settings panel. Under Voice, open the voice browser, listen to the voices and choose one. The default model is ElevenLabs v3. Click Run under the node to make the voiceover.
Merge the video and the voiceover
Add a Merge Video & Audio node. Connect the output of Generate Video and the output of Text to Speech to its Media input. Click Run under the node. The result is one video with the voiceover on it.
Run the whole workflow
Change the scene or the narration, then click Execute workflow at the bottom of the canvas. Nodaro shows how many nodes will run and the estimated credits, and asks you to confirm. Click Run. Every node runs in order, and each node starts when the nodes before it are done.
How to connect nodes
Every node has its inputs on the left edge and its outputs on the right edge. The colour and the icon of an input show which kind of data it accepts, such as text, an image, a video or audio.
- Drag from an output to an input to connect two nodes. The editor refuses a connection that does not fit, for example a video into a prompt input.
- One output can feed many inputs. The same Text node can feed several image nodes.
- Drop a connection on empty canvas to open the node picker with only the nodes that can connect there. The new node is connected for you.
- Click an input to see what is connected to it, jump to a connected node, disconnect it, or add a new node that fits.
- Delete a connection by clicking it and pressing Delete.
Nodes and connections explains every kind of input and output, and how a connection can pass one result or a whole list.
Run one node or the whole workflow
| Button | Where it is | What runs |
|---|---|---|
| Run | In the strip under a node, or Run This Node in the settings panel | Only this node. It uses the current results of the nodes before it. |
| Run from here | Under a Text node, or in the settings panel of a node with connections after it | This node and every node after it, in order. |
| Execute workflow | At the bottom of the canvas | Every node in the workflow, in order. Nodaro always asks you to confirm first. |
Run single nodes while you try ideas, because you pay only for the node you run. Use Execute workflow when every step is ready. Running workflows covers progress, stopping a run, failures and refunds.
Where results appear
- On the node. Each node shows its latest result. Point at the result to download it, open it full screen or delete it.
- As versions. Every run of a node adds a new result and keeps the earlier ones. When a node has more than one result, a small counter appears on it. Click the counter to show the versions and choose one.
- Passed to the next node. The selected version is the one the connected nodes receive. By default, that is the newest result.
- In your account. Every generated file is listed under My Files in the sidebar, and every run of the workflow is listed under Executions.
Change the model
Each generation node runs one model at a time, and you can switch it at any moment.
- From the node. Click the model name in the strip under the node. Search by name, by company, or by a setting such as
16:9,2Kor8s, and choose a model. - From the settings panel. Double-click the node and choose a model under Provider. The settings panel also shows the settings that the model supports, such as Aspect Ratio, Resolution or Duration.
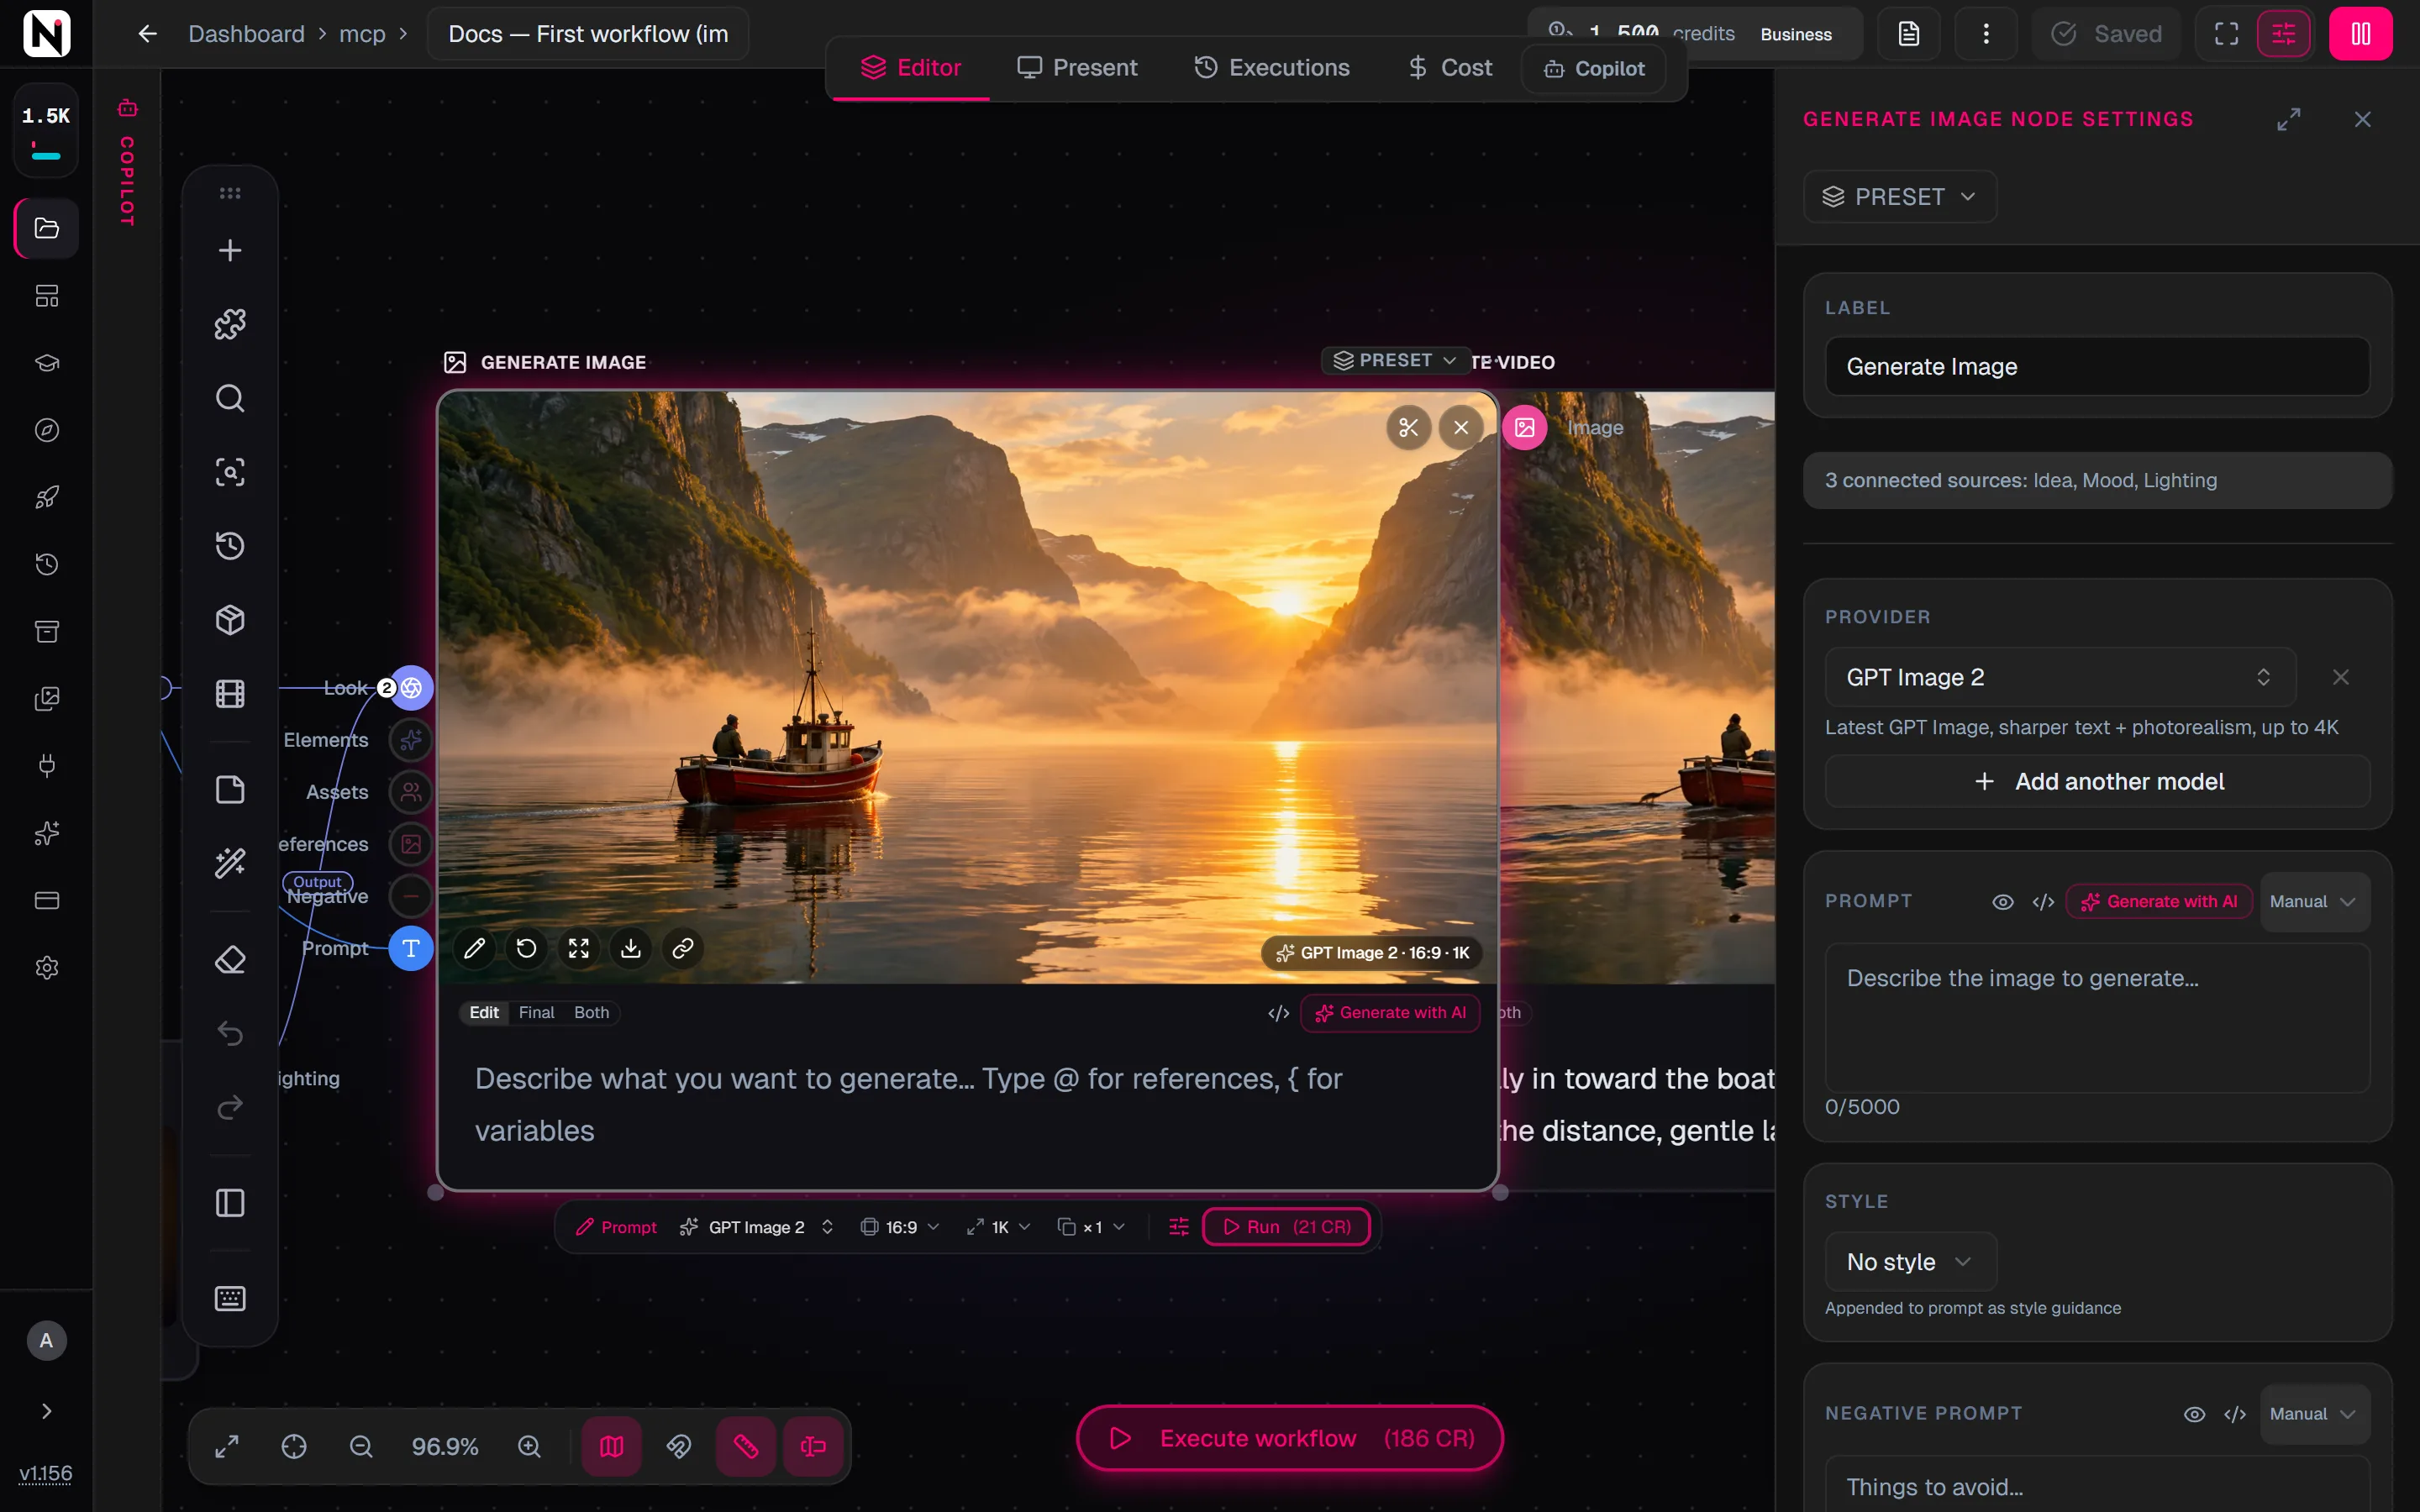
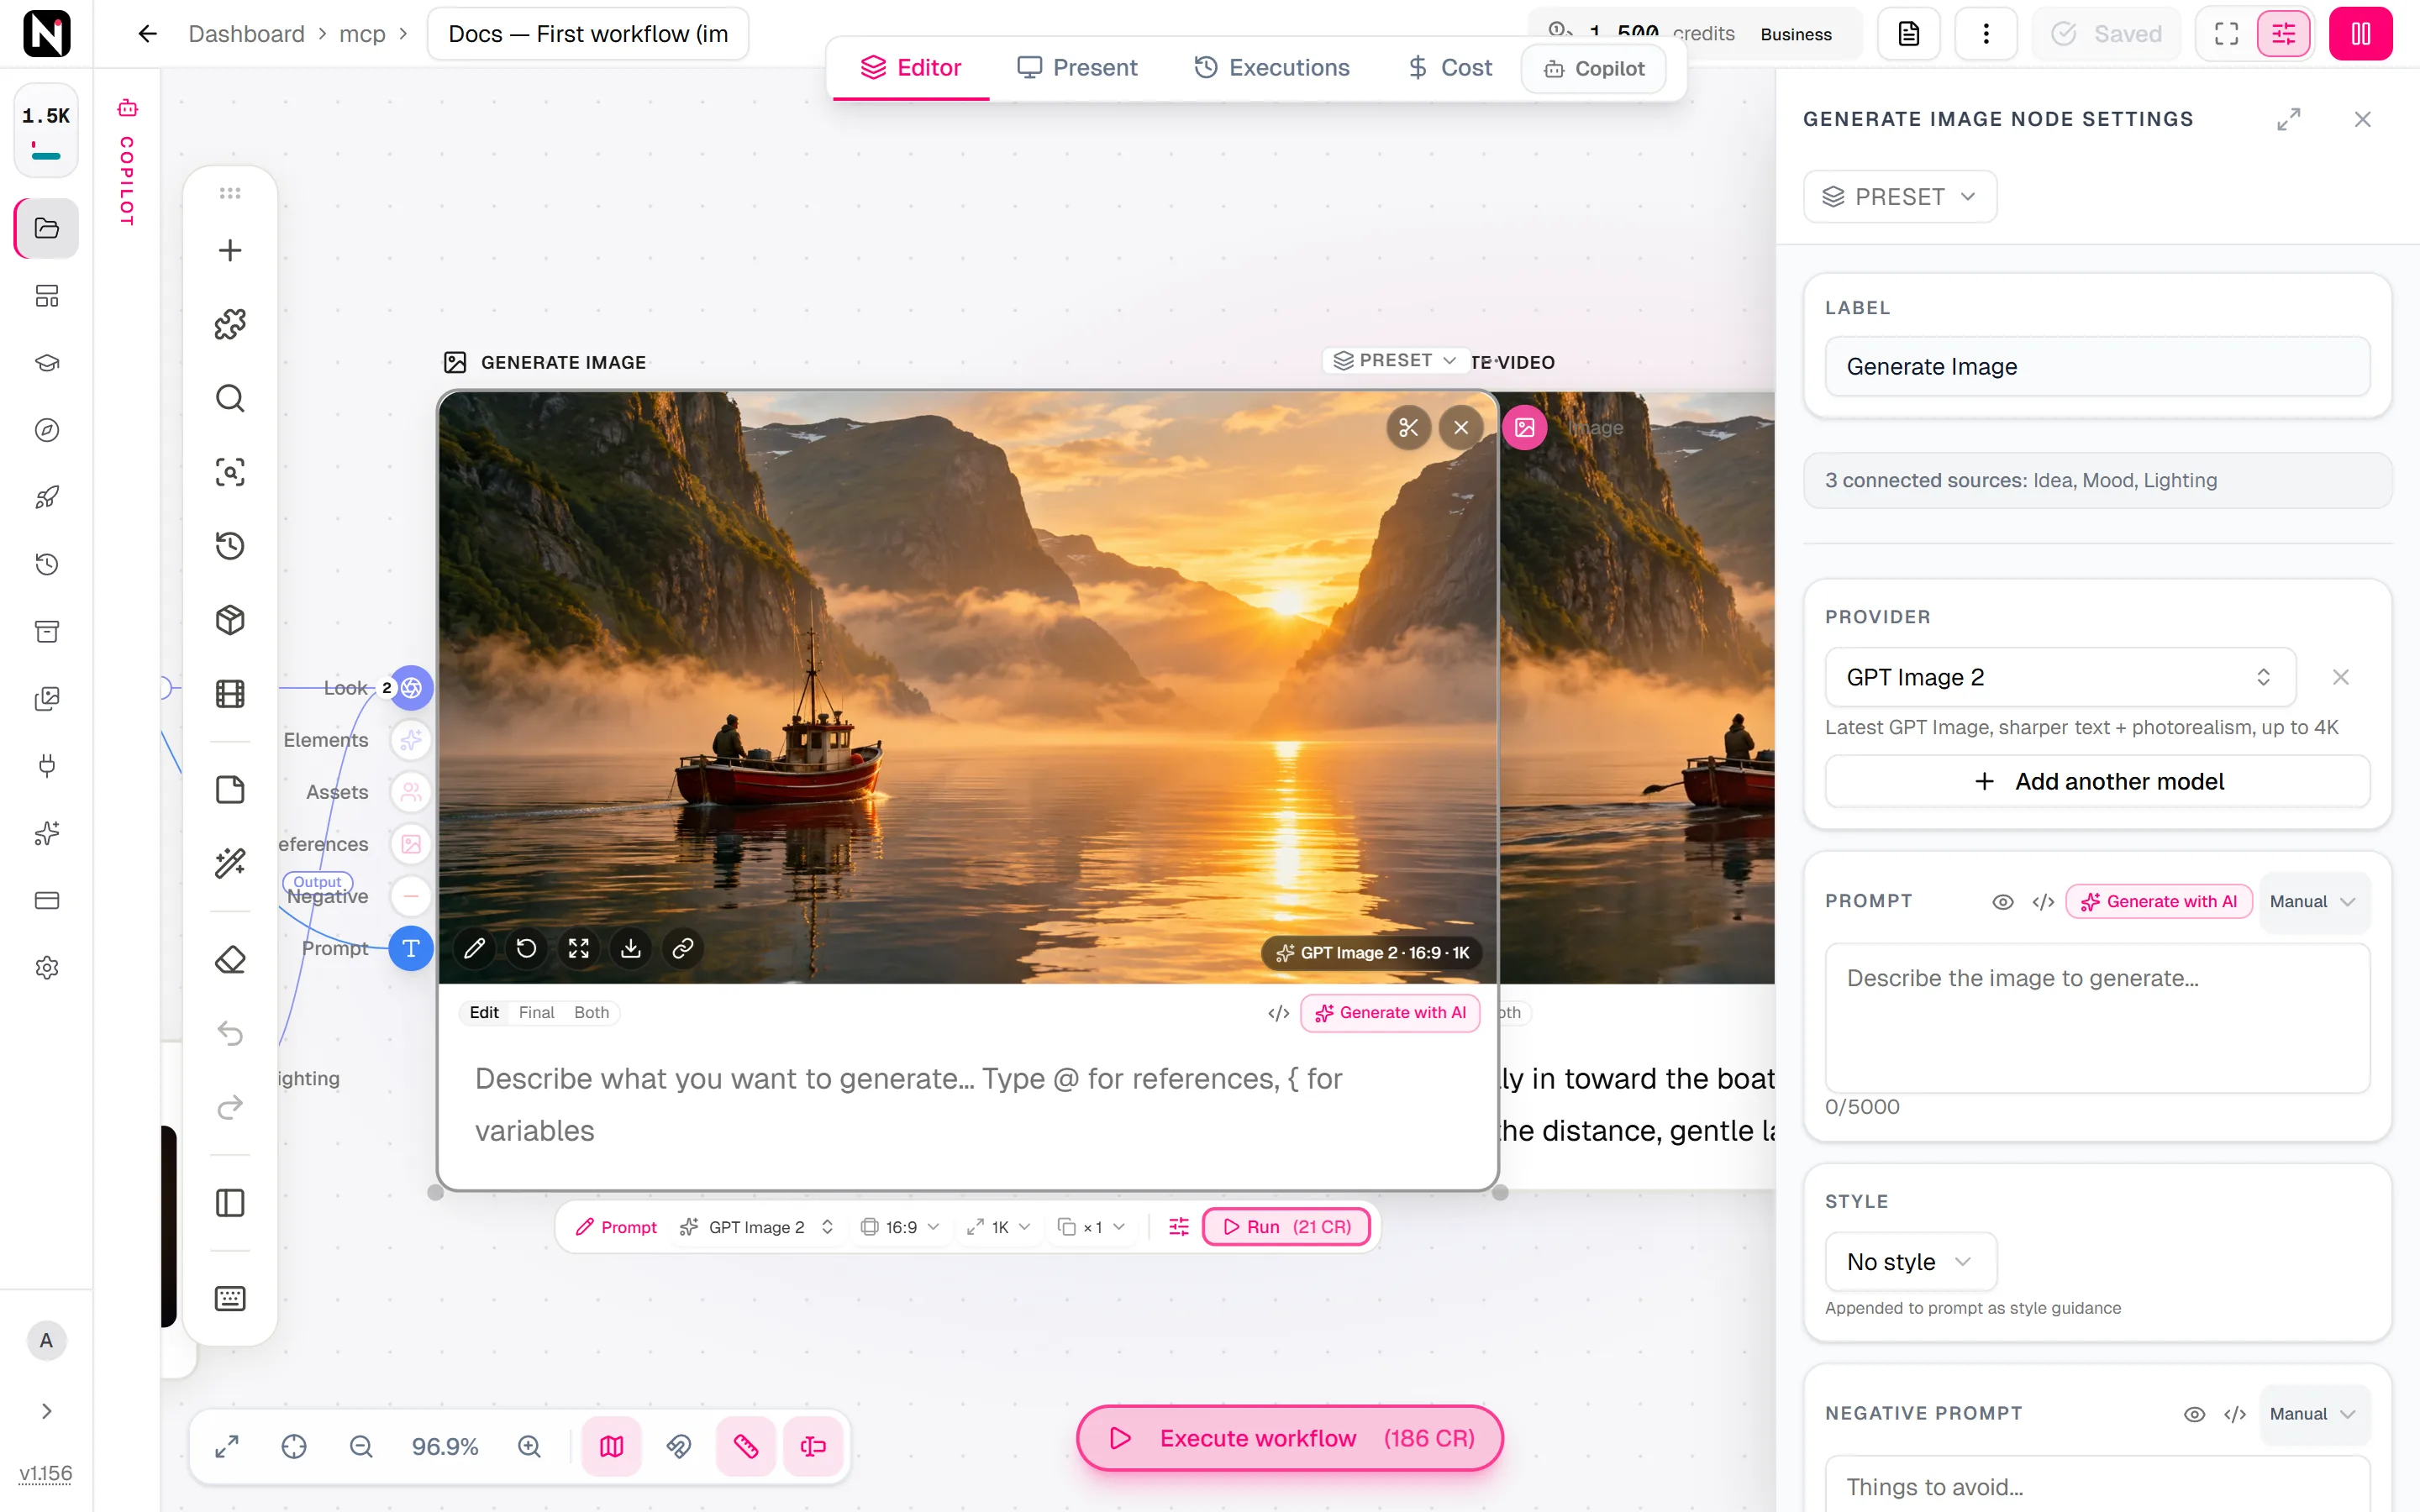
The price on the Run button updates when you change the model or its settings. Some video models need an image in Start Frame: without one, Run stays disabled and its tooltip names the model. For help choosing, read Choosing a model or browse the models.
What it costs
Text nodes are free. Every other node shows its price on its Run button, and Execute workflow shows the estimate for the whole workflow. The price depends on the model and on settings such as resolution and duration. Running a node again costs the same again.
These are the default models of the nodes in this guide:
| Model | Maker | Modes | Credits | Details |
|---|---|---|---|---|
| Nano Banana Pro | Text to image, Image to image | from 45 | Top-tier Nano Banana — best for text rendering, diagrams, and complex compositions. | |
| Seedance 2 Fast | Bytedance | Image to video, Text to video | from 180 | Cheaper / quicker Seedance 2 tier. |
| ElevenLabs v3 | ElevenLabs | Text to speech | 30 | Latest ElevenLabs TTS — supports [audio tags] for emotion / pacing. Direct API. |
To spend less while you experiment, run single nodes instead of the whole workflow, draft on cheaper models, and choose the higher resolution only for the final version. Credits explains how credits work.
Tips
- Name your nodes. Double-click a node and change its Label in the settings panel, for example "Scene" and "Narration". Labels make a large workflow easier to read, and you can use a label as a prompt variable.
- Keep a result you like. Before you click Execute workflow again, right-click a node and choose Skip Node. The node keeps its result and is not run again, and the nodes after it still use that result.
- Tidy the canvas. Click Tidy Up in the canvas toolbar, or press Alt+T, to arrange the nodes.
- Add a look. Connect a Lighting or Mood picker to the Look input of Generate Image to change the style without rewriting the prompt.
Frequently asked questions
Related
Tour of the editor
Nodes and connections
Running workflows
Generate Image
Generate Video
Last updated on
Tour of the editor
A tour of the Nodaro editor, from the home screen and sidebar to the canvas, node picker, settings panel, runs, results, the Copilot and keyboard shortcuts.
Build a workflow with the Copilot
The Copilot builds and edits Nodaro workflows from a description, proposes runs with a credit estimate, fixes failures and never spends credits without your OK.