
 Nodaro Docs
Automations
Run a workflow without clicking Run, on a schedule, from a webhook, when a Telegram bot gets a message, or from the API, with a daily news video example.
An automation is a workflow that starts without you clicking Run. It can start on a schedule, when another system calls a webhook, when your Telegram bot gets a message, or from your own code through the API. You add a trigger node to the workflow, save it, and turn it on. Triggers are free; each run pays only for the nodes it runs.
Four ways to start a run
| Way | Starts when | Set up with | Cost of the trigger |
|---|---|---|---|
| Schedule | A time rule matches, such as every weekday at 9:00 | Schedule Trigger | Free |
| Webhook | Another system sends an HTTP request to the workflow's URL | Webhook Trigger | Free |
| Telegram | Your Telegram bot receives a message | Telegram Trigger | Free |
| API | Your code asks Nodaro to run the workflow | An API token and the Workflows API | Free |
What a triggered run executes
- A trigger connected to other nodes runs only the branch behind it. That is the nodes after the trigger, plus every node they need as input. Those input nodes run again, for a fresh result. Nodes the trigger does not reach are left alone.
- A trigger connected to nothing runs the whole workflow.
- One workflow can have several triggers, each starting its own branch. For example, a schedule and a webhook can start the same work.
- A run from the editor, from the API or from a published app is not limited by triggers.
"Connected" includes a drawn connection, membership in a Group, and a field that reads another node's value.
Example: a daily news video
This workflow reads the newest item of a news feed every morning, turns it into a short vertical video with a caption, and posts it.
Read the feed
Add an RSS Feed node and paste the address of an RSS or Atom feed. Leave Item Index at 0, which is the newest item. The node returns the item's title, description and link.
Write the video prompt
Add a Prompt node and connect the RSS Feed to it. Ask it for one video prompt, for example:
Write one prompt for an 8-second vertical video that shows the main idea of this news item. Describe the scene, the camera and the light in under 60 words. Do not include any text on screen.
Make the video
Add a Generate Video node and connect the Prompt node to its Prompt input. Choose VEO 3.1 Fast, the 9:16 aspect ratio and 8 seconds.
Write the caption
Add a second Prompt node, connected to the RSS Feed. Ask it for a caption under 150 characters with three hashtags.
Publish
Add Publish to Social. Connect the video and the caption to it, choose your account and the Post Reel action. See Publish to social media to connect an account.
Test it, then schedule it
Run the workflow once from the editor and check the post. Then add a Schedule Trigger, click the Daily 9am preset, choose your time zone, save, and turn the switch on. Leave the trigger unconnected, so it runs the whole workflow.
What each run costs. Most of the price is the video: 150 credits for an 8-second VEO 3.1 Fast clip. Publishing adds 10 credits, and the two Prompt nodes add a few credits. Check the total on Execute workflow before you turn the schedule on.
Variations. To read a web page or search results instead of a feed, use Web Scrape. To keep every video in your account with a clear file name, add Save to Storage after Generate Video.
Schedule Trigger
A schedule is a list of rules. The workflow runs whenever any rule matches the current minute, in the time zone you choose.
Set up a schedule
- Add Automate › Triggers › Schedule Trigger.
- Click a preset, Every 5 min, Hourly, Daily 9am or Weekdays 9am, or build your own rules.
- Choose the Timezone. Without one, the rules are read in UTC.
- Save the workflow, then turn the schedule on.
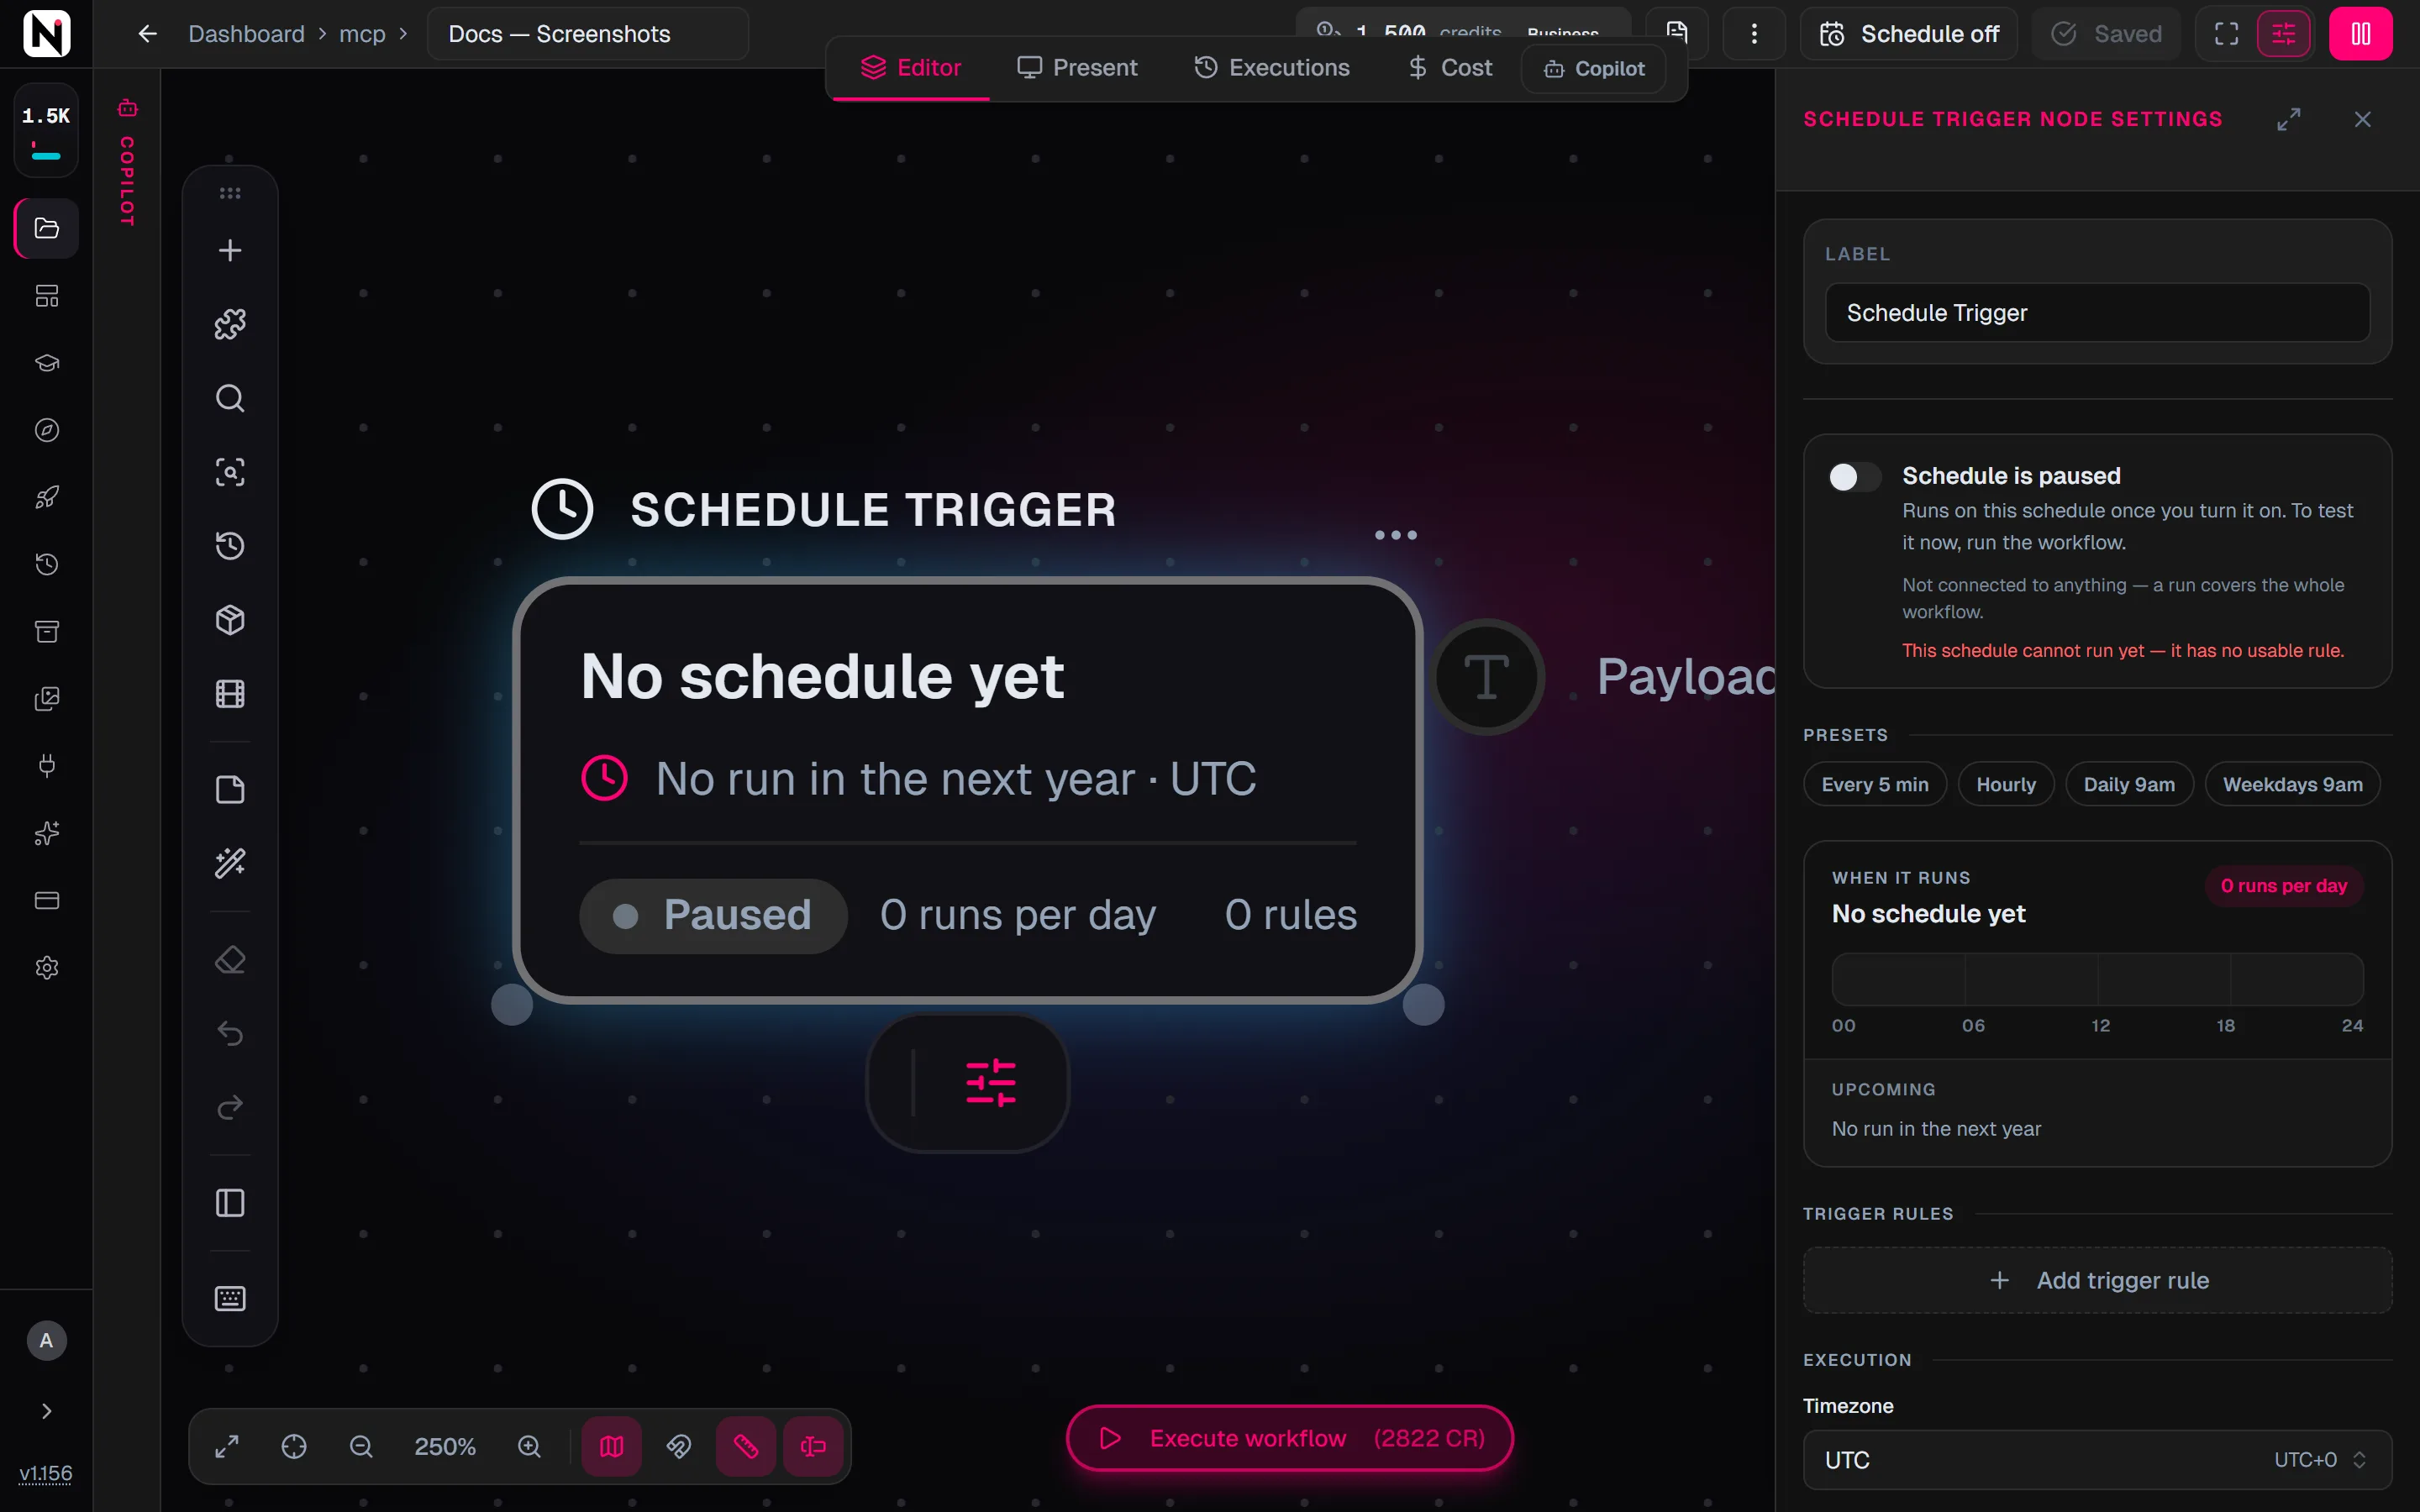
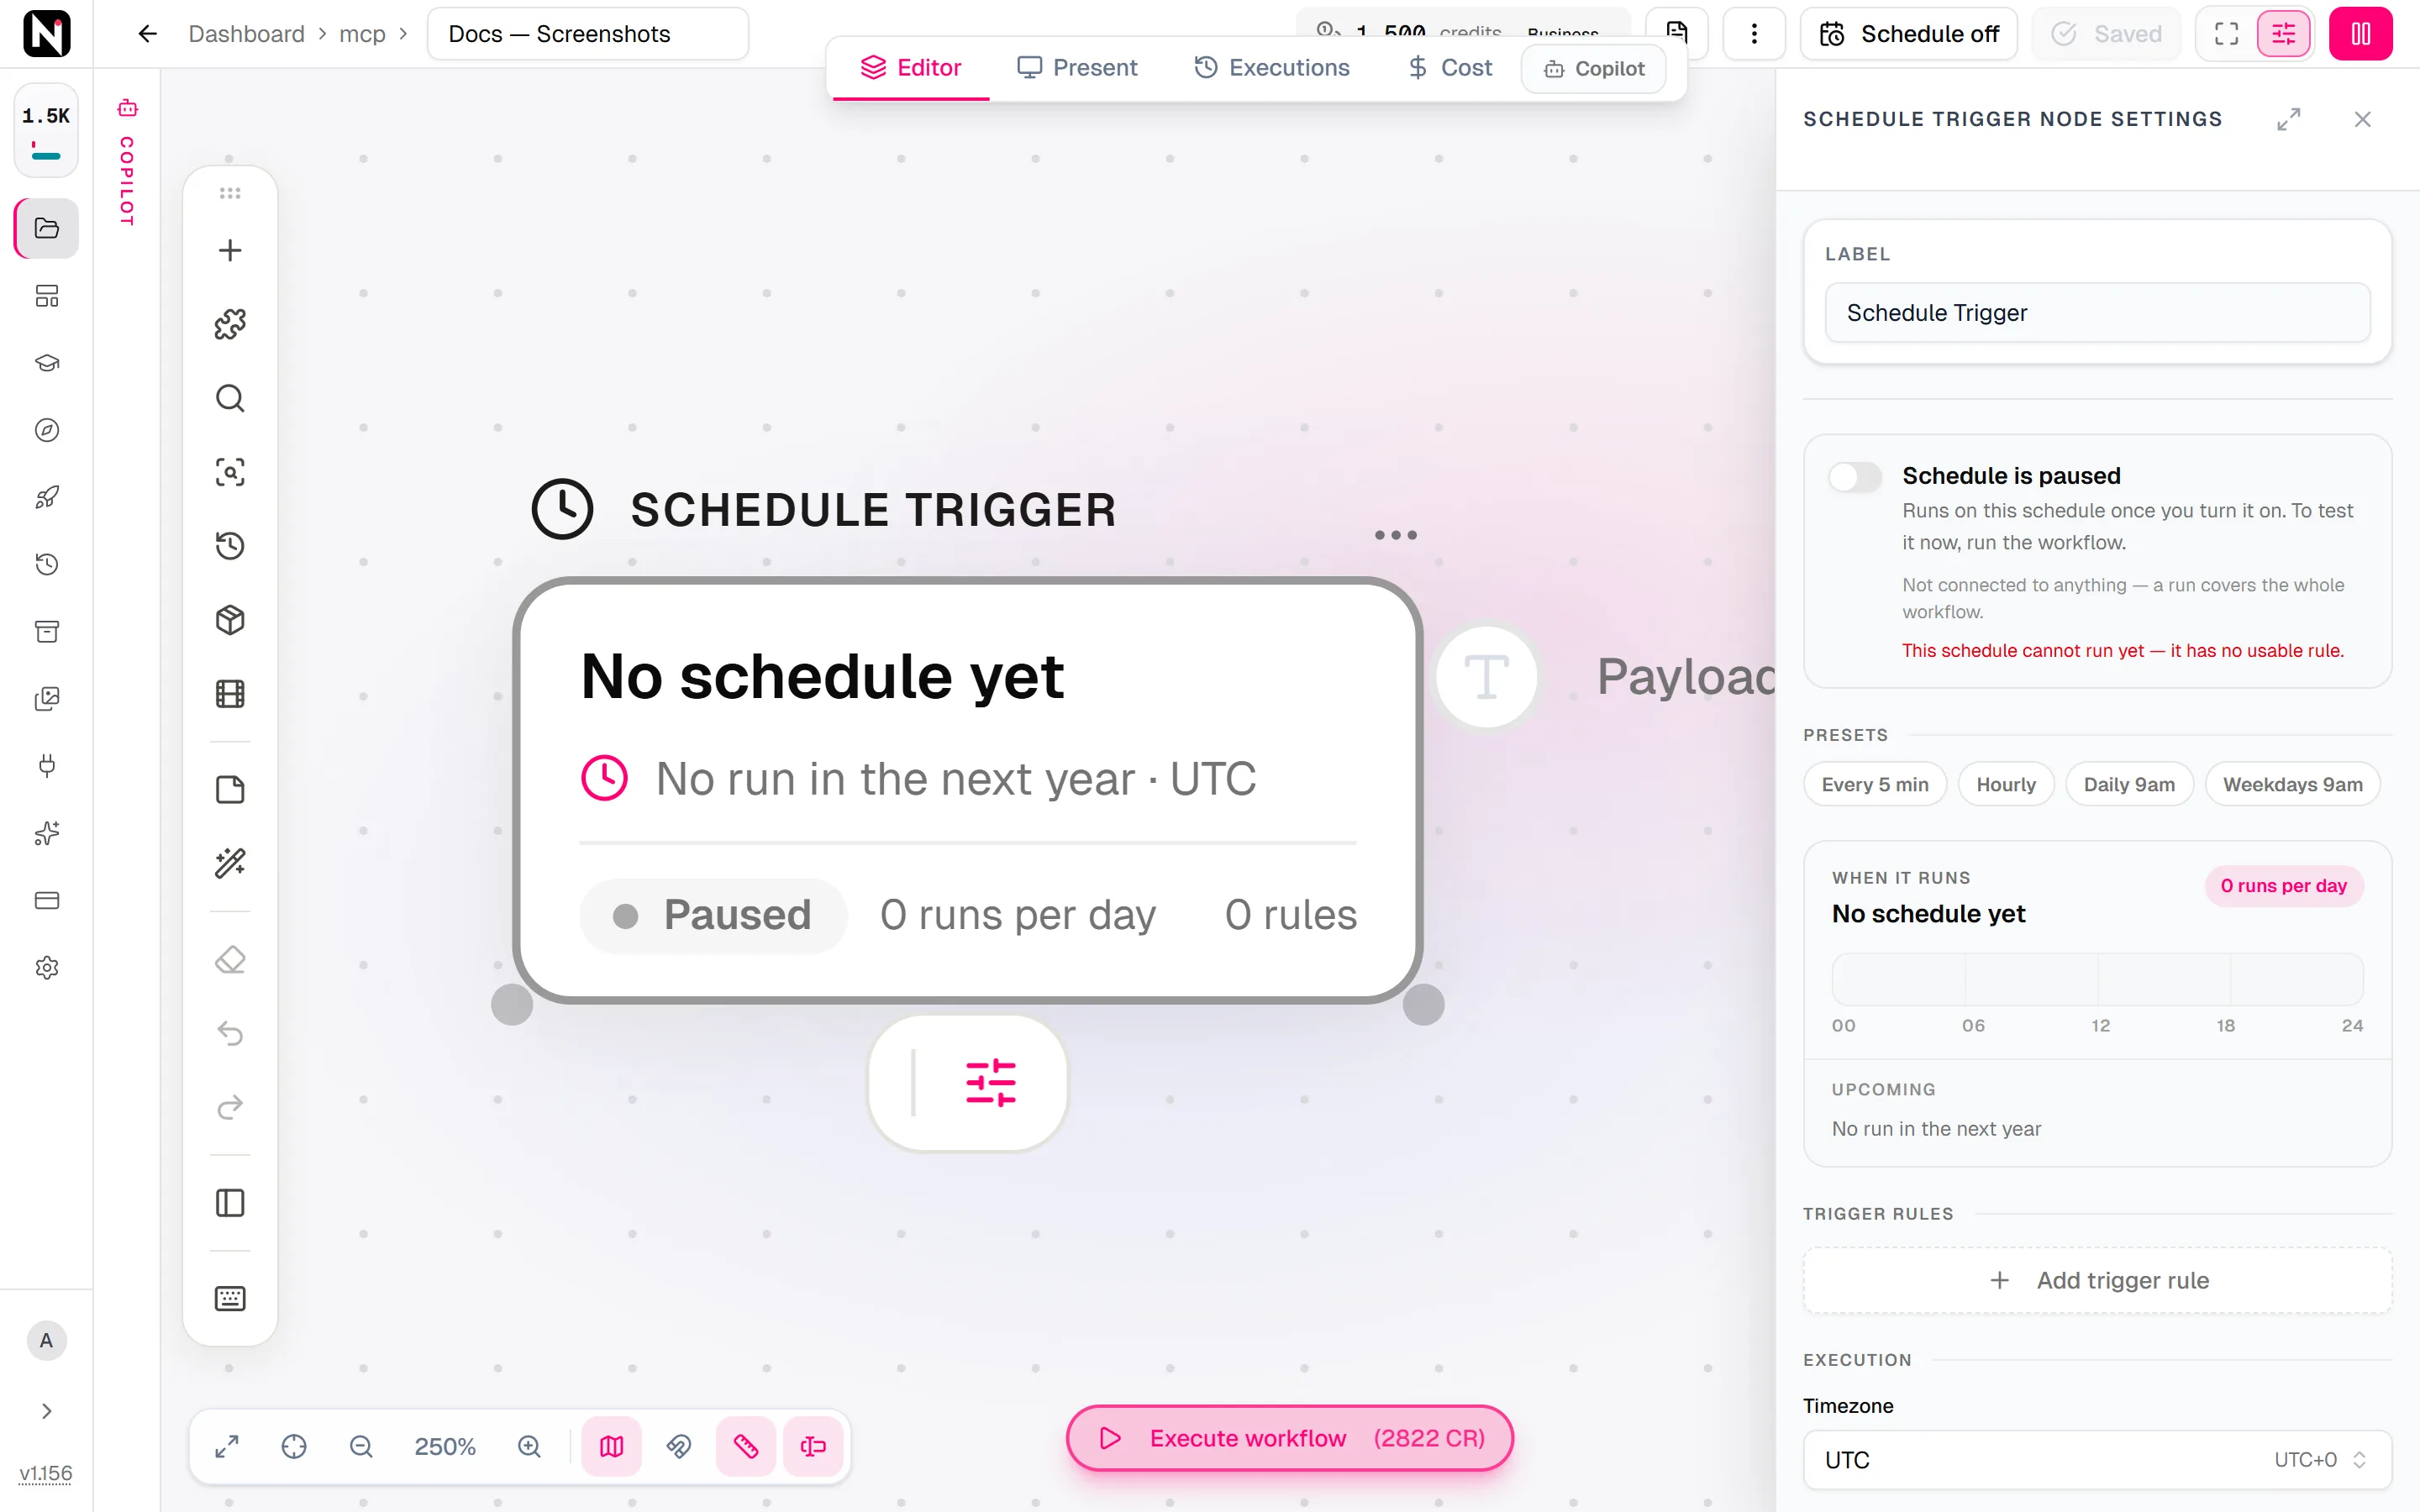
A schedule runs only while its switch is on. Saving registers the schedule, but it starts paused. Turn it on with the switch at the top of the node's settings. The Schedule button in the editor's top bar does the same for every schedule in the workflow at once. To try a connected trigger's branch now, without turning the schedule on, click Run from here at the bottom of the settings. A trigger connected to nothing has no branch, so run the whole workflow instead.
Rules
| Interval | You set | Runs |
|---|---|---|
| Minutes | Every 1 to 59 minutes | At minute 0, N, 2N and so on of every hour |
| Hours | Every 1 to 23 hours, and the minute | At hour 0, N, 2N and so on of every day, at that minute |
| Days | Every 1 to 31 days, the hour and the minute | Every Nth calendar day at that time |
| Weeks | Every 1 to 52 weeks, the weekdays, the hour and the minute | On those weekdays, every Nth week. Weeks start on Monday. |
| Months | Every 1 to 12 months, the day of the month, the hour and the minute | On that day, or the month's last day when the month is shorter, every Nth month |
| Custom (cron) | A 5-field cron expression | Whenever the expression matches |
A schedule can have several rules; the last rule cannot be removed. Max executions stops the schedule after that many runs. Leave it empty for no limit.
The settings panel shows what your rules mean before you save. You see the schedule in words, the number of runs a day, today's runs on a 24-hour bar, and the next three runs. The node shows the next run and whether the schedule is active or paused.
How a schedule fires
- Nodaro checks every schedule once a minute. The same minute never runs twice, even after a restart or when the clocks go back. A minute that the clocks skip is skipped that day.
- If the previous run of the workflow is still going, that minute is skipped.
- After Max executions runs, the schedule stops firing. Raise or clear the limit to continue.
- A schedule that cannot run shows Won't run while its switch is on. Common causes are a custom rule with no cron expression, a weekly rule with no weekday, or a time zone Nodaro cannot read. Fix it and save again.
Webhook Trigger
A webhook lets another system start the workflow by sending an HTTP request to a private URL. For example, a form or a shop can call it when something new arrives.
- Add Automate › Triggers › Webhook Trigger.
- Under Output Parameters, add the values the workflow expects. Each one has a Name, the key in the request's JSON body, and a Type: text, image URL, video URL or audio URL. The type lets later nodes use the value correctly.
- Save the workflow. Saving creates the webhook, and the node shows its Webhook URL.
- Send a
POSTrequest with a JSON body to that URL.
curl -X POST "<your Webhook URL>" \
  -H "Content-Type: application/json" \
-d '{"topic": "our new running shoe", "imageUrl": "https://example.com/shoe.jpg"}'- The URL stays the same across later saves. Deleting the node retires it.
- Up to 10 requests a minute for each webhook URL.
- Treat the URL like a password. The URL contains its own secret key. Anyone who has it can start the workflow and spend your credits.
Telegram Trigger
A Telegram Trigger starts the workflow when your Telegram bot receives a message.
- Connect your bot under Integrations by pasting its token.
- Add Automate › Triggers › Telegram Trigger and choose the Telegram Bot.
- Optionally, limit it to one chat with Chat ID Filter, and to some Message Types: text, photo, video, audio or document.
- Click Activate Trigger, then save the workflow. The node shows Active — listening when it is ready.
Each message that matches starts a run. The trigger passes on the message text, the chat and message IDs and the message type. It also passes a link to any photo, video or audio, which Nodaro first copies to your storage.
- Several triggers can share one bot. Each message is checked against every trigger's filters, and each matching trigger starts its own run.
- Group messages. A bot receives only the group messages addressed to it, unless you turn off its group privacy mode in BotFather.
- Large files. Telegram lets bots download files up to 20 MB. A larger file arrives as a message without its media.
- If the save warns that the trigger could not be registered, the warning says why. A common cause is a bot token that was revoked after you connected it.
Start runs from the API
Your own code can run a workflow with an API token from Settings › API. Send the workflow ID and the input values to POST /v1/api/run. The inputs are keyed by node ID, or by a node's unique label.
curl -X POST "https://app.nodaro.ai/v1/api/run" \
  -H "Authorization: Bearer $NODARO_TOKEN" \
  -H "Content-Type: application/json" \
  -d '{"workflowId": "<workflow id>", "inputs": {"Text": {"text": "a cat at sunset"}}}'
The run starts at once and answers with an execution ID. Check its status until it is done, then read the results. For short workflows, add ?wait=true&timeout=120 to wait for the result in the same request. The timeout can be up to 600 seconds. See the Workflows API. AI assistants connected through MCP can run your workflows too.
Keep and check unattended runs
- Every run is in Executions. The Executions list shows each run with its results and errors. A badge shows how it started, such as Manual, Webhook, Scheduled or App run.
- Keep a named copy. Add Save to Storage at the end of the branch. It saves the result to your account with a file name, even when nobody has the editor open. See Assets and media.
- Send results onward. End the workflow with Publish to Social, Save to Storage or Webhook Output.
Tips
- Start slow. Use a longer interval first, and set Max executions while you test. Shorten the interval once the branch behaves.
- Test before you turn it on. Run from here runs a connected trigger's branch once, without turning the schedule on. For a trigger connected to nothing, run the whole workflow from the editor.
- Watch your credits. Every run pays for its nodes. A schedule every 5 minutes runs 288 times a day.
- Automations follow your access. Each time a trigger fires, Nodaro checks that the person who set it up may still run the workflow. In a workspace, a trigger stops when that person loses access, and the run history shows one failed run that says why.
Frequently asked questions
Related
Schedule Trigger
Webhook Trigger
Telegram Trigger
Publish to social media
Workflows
Last updated on