
 Nodaro Docs
Remove Background
Remove the background from an image in one step. The node returns a transparent PNG of the subject, ready to place on a new scene or a brand graphic.
The Remove Background node cuts the subject out of an image. It removes everything behind the subject and returns a transparent PNG, ready for compositing. The node has no settings and no prompt: connect an image and run it.
When to use it
- Cut a product out of its photo to place it on white, on a new scene or in an ad.
- Place a person or an object on a new background with Image Overlay.
- Make stickers and badges for thumbnails and social posts.
- Prepare a logo. An opaque JPG logo is placed as a rectangle, so remove its background before you use it as a layer.
Quick start
Add the node
Press Tab on the canvas and choose Image › Edit & Retouch › Remove Background.
Connect the image
Drag from an image node, such as Upload Image or Generate Image, to the Image input.
Run it
Click Run on the node. The cut-out appears on the node as a transparent PNG.
Inputs
| Input | Accepts | What it does |
|---|---|---|
| Image | Image nodes, such as Upload Image, Generate Image, Modify Image and Extract Frame | The picture to cut out. Required. |
The output, Image, is a transparent PNG with only the subject.
Model
Remove Background runs one model, Recraft Remove BG. There is nothing to choose.
| Model | Maker | Modes | Credits | Details |
|---|---|---|---|---|
| Recraft Remove BG | Recraft | Background removal | 3 | Remove image background. Cheap utility. |
Example
A product photo made with Generate Image, and the transparent PNG that Remove Background returned. The checkerboard marks the transparent area.
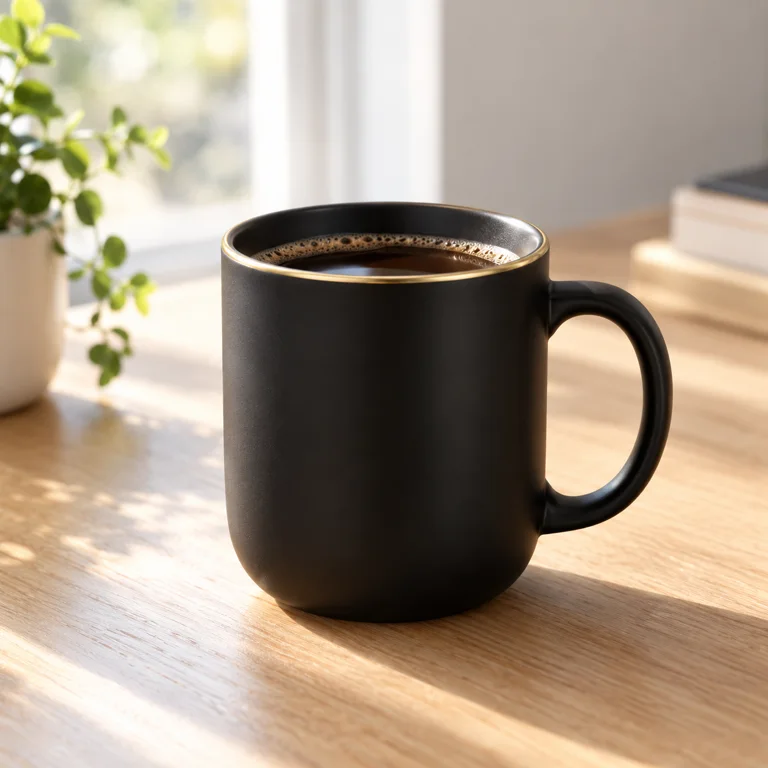 Before
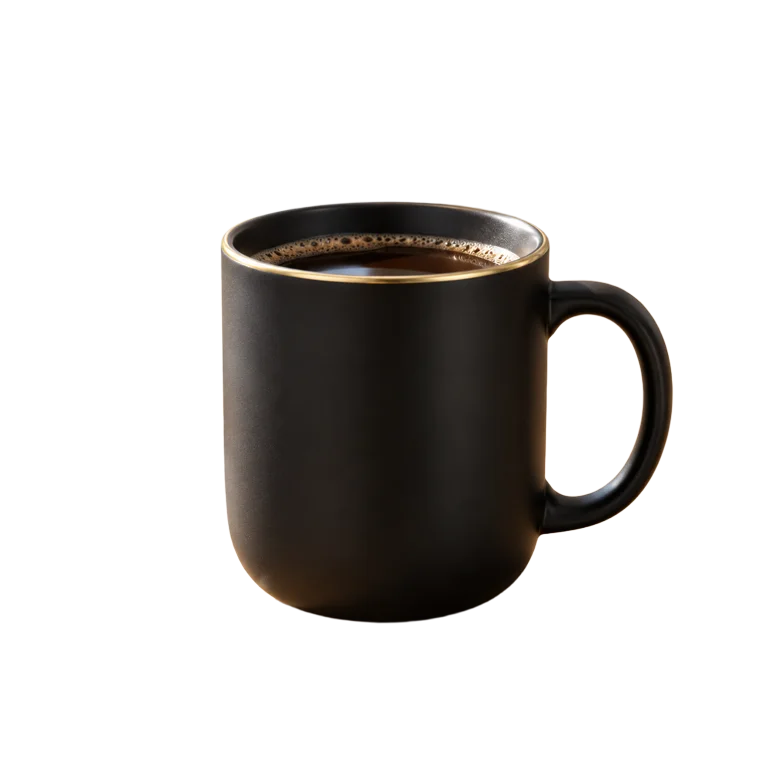 After
AfterThe mug keeps its handle, including the gap inside it, and its gold rim. The table, the plant and the window are gone.
Get clean edges
- Clear edges work best. The result is cleanest when the subject stands out against the background.
- Hair and transparent objects are hard. Fine hair, glass and other see-through objects can keep traces of the old background. Check them before you publish, and touch them up later in the workflow if needed.
- The cut-out is not a mask. Remove Background puts the transparency into the PNG itself. When an editing node needs a black-and-white mask of a subject, use Generate Mask.
Tips
- Add a shadow when you place the cut-out. A soft drop shadow in Image Overlay lifts a person or a product off a busy background.
- Upscale after the cut. Remove the background first, then send the cut-out to Upscale Image.
- Keep brand assets as files. To put a real logo on an image, remove its background here and place the file with Image Overlay. A generative edit would redraw the logo.
Frequently asked questions
Related
Image Overlay
Upscale Image
Generate Mask
Modify Image
Recraft Remove BG
Last updated on
Upscale Image
Enlarge and sharpen an image without a prompt. Use Recraft Upscale for quick, low-cost results or Topaz Upscale at 1x, 2x or 4x for final files.
Generate Mask
Describe a subject in plain words, such as "the red car", and get a black-and-white mask of it to repaint only that area in an editing node.